How to Upload Layers in Cricut Designer
This tutorial utilizes an SVG file with multiple overlaid images. This will show you how turning on/off the layers tin aid you easily and speedily create a variety of potential images. If you're interested in purchasing this file y'all can do so on Etsy.
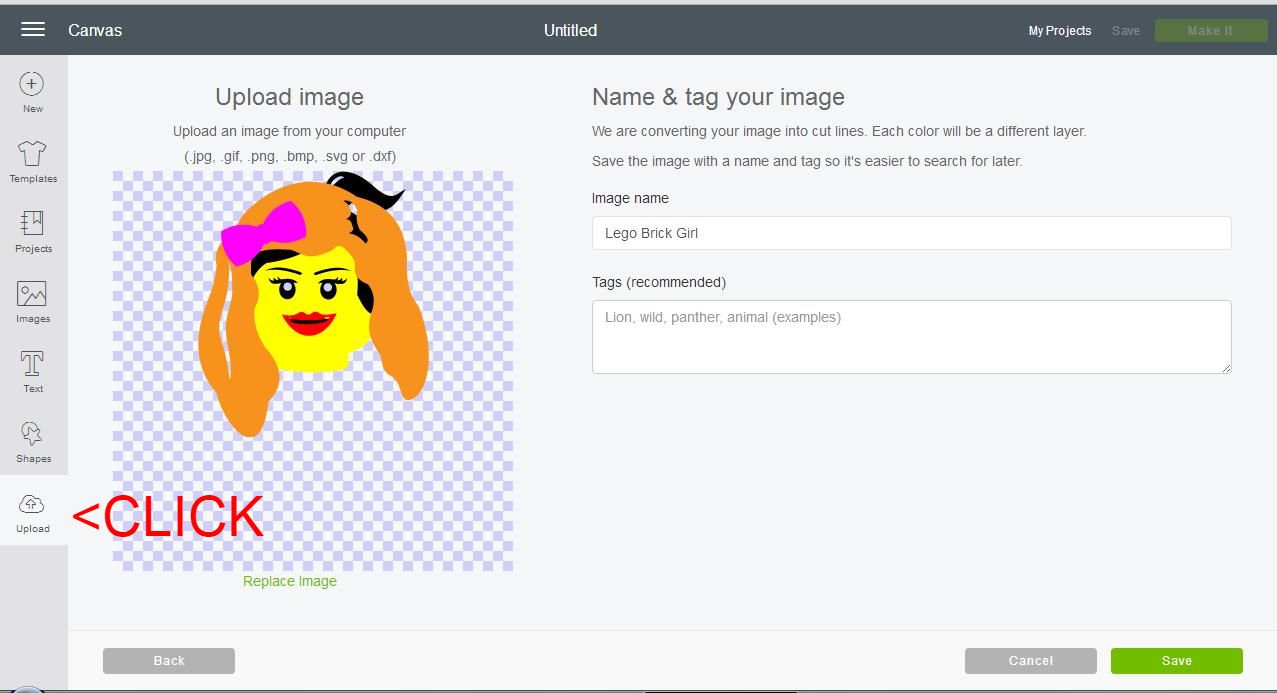
Step ane: Upload Your File Into Cricut Design Infinite
Log into your Cricut Design Space business relationship and select New Project. This will open up a bare Canvass. Merely, click the Upload button on the lesser left of the screen. This volition bring upward the screen from the image beneath. Choose the appropriate file and upload from your computer. You can choose to change the Paradigm name as well as to create Tags (to aid yous locate later on). One time yous are done, click Save.
Step 2: Manipulate the layers
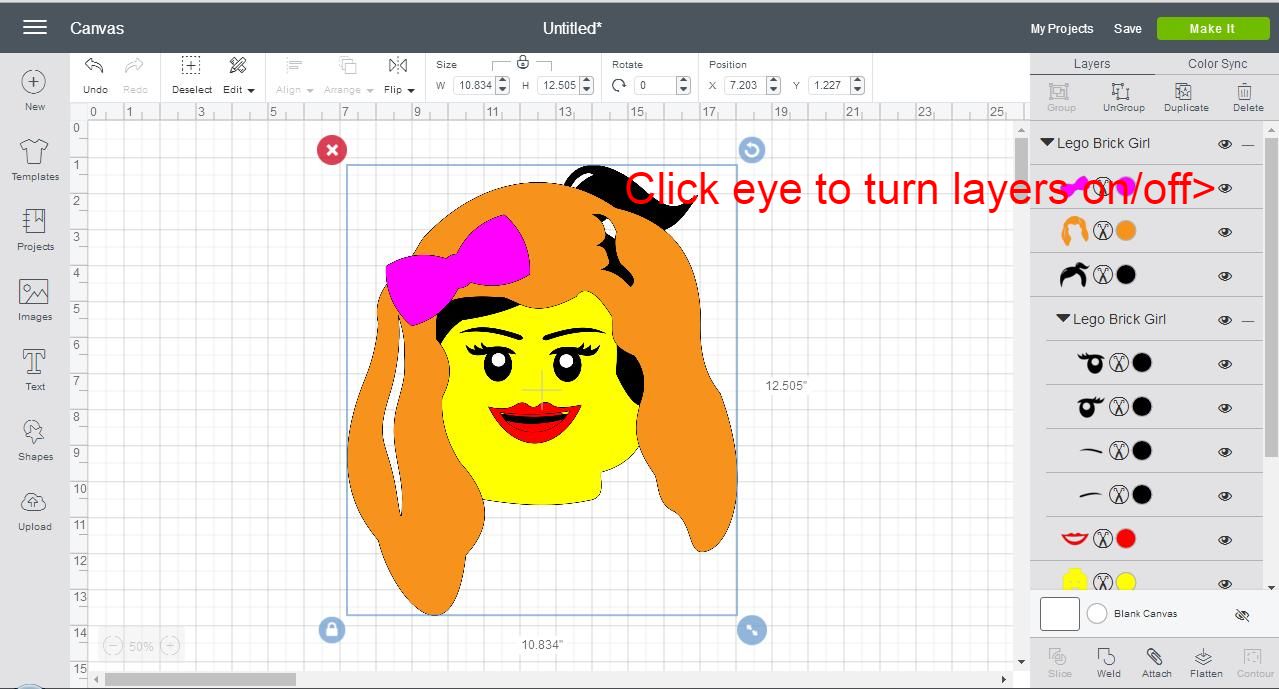
This Lego-inspired Miss Brick .SVG file contains multiple over-laid layers. When information technology'southward opened it may seem intimidating. Nonetheless, it was created for the purpose of easily existence able to dispense the pattern without having to move layers around. If all of the images were spread out, y'all would have to align them to the proper location likewise as ensuring that they're on the correct plain/layer. For this instance, all that y'all have to practise is turn the layers on or off. You can do that past clicking the eye next to the paradigm layer.
Pace 3: Create your desired Image
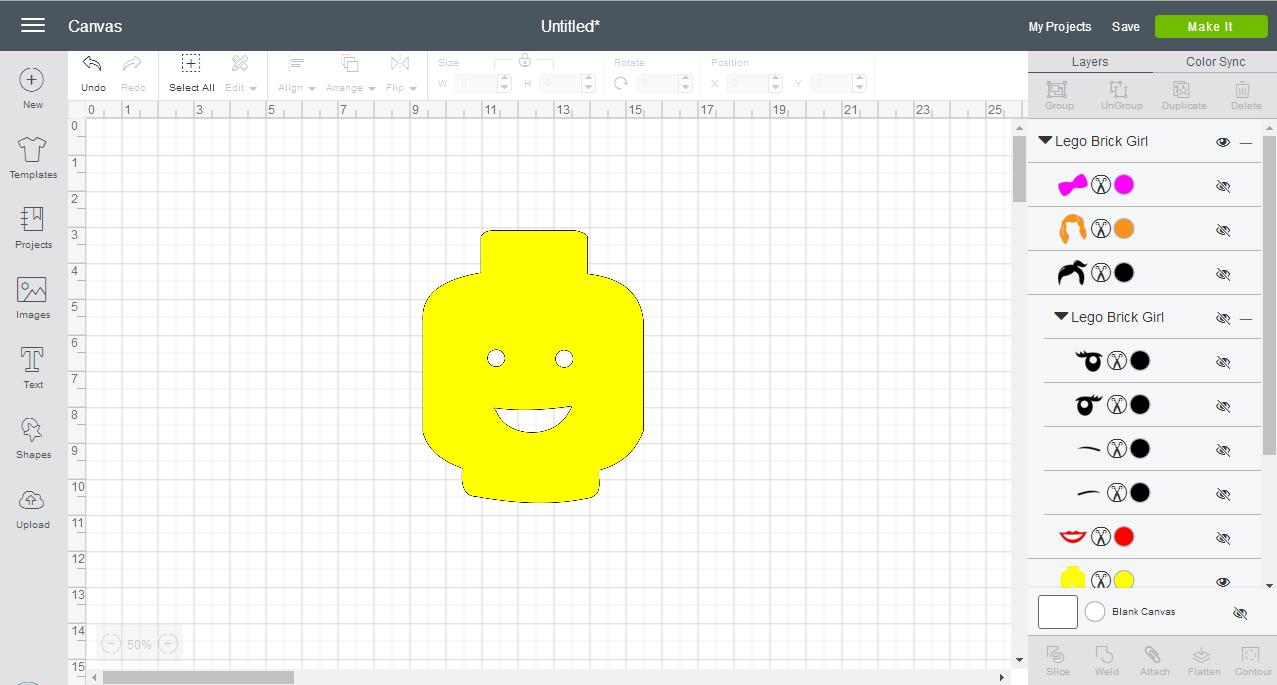
As mentioned in the prior step, you click the eye to the right of the image to plow the layers on and off. Do and then until you have created the image that your want. The beneath epitome has 4 Agile colored layers: Orange, Black, Carmine, & Yellow. You may asking, "What about the white layer?" In order to minimize work and cost (ie: less heat pressing and less vinyl expenses), cut-outs were added to the images. For instance, this called yellow layer (there are two in the file) has cut out sections for the eyes and the mouth. The cut-outs thus take on the colour of their groundwork. In this instance, the ideal fabric is lite-colored or white. The center cut-outs have the added bonus of helping to marshal the optics (black) and mouth (scarlet) when heat transferring onto the fabric.
STEP 4: Play around to create different images
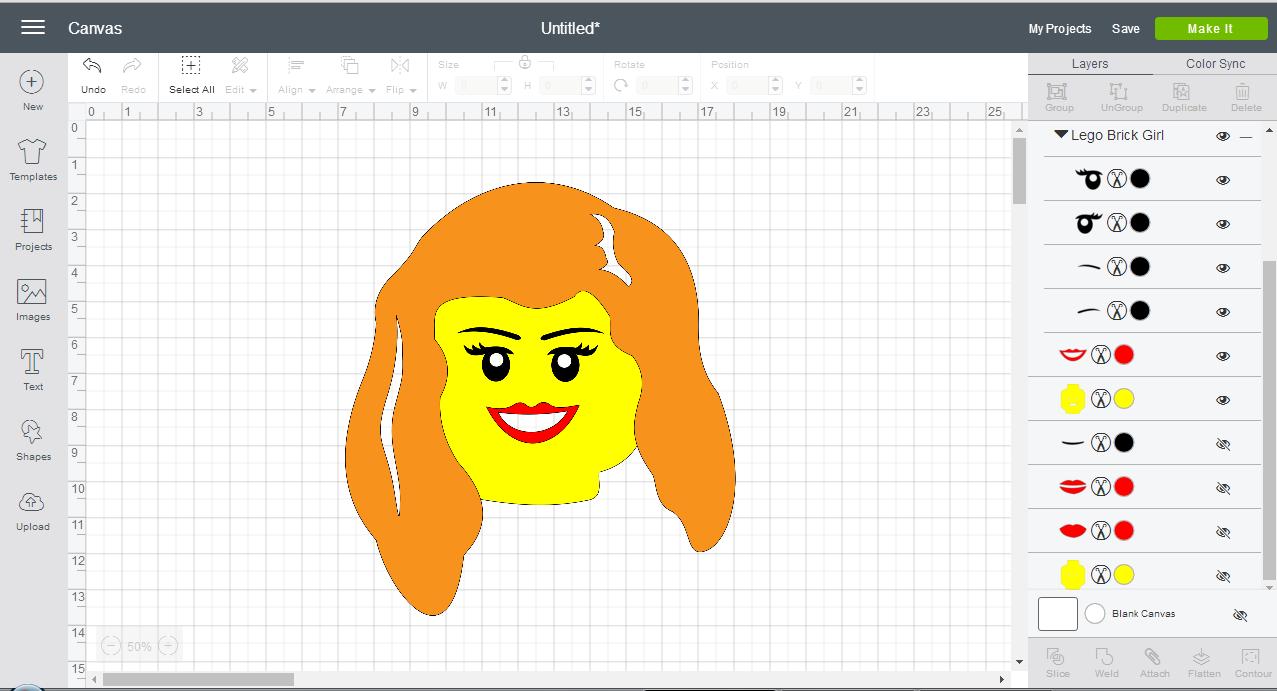
By turning the layers on and off you lot can create a great deal of images. Dissimilar the epitome to a higher place, the below picture uses the yellow head pattern that does not have a cutting-out for the mouth. The below image uses just 3 layers: Blackness, Red & Yellowish. Again the white items shown are cut-outs from their respective layers.
Step 5: The yellowish head explained
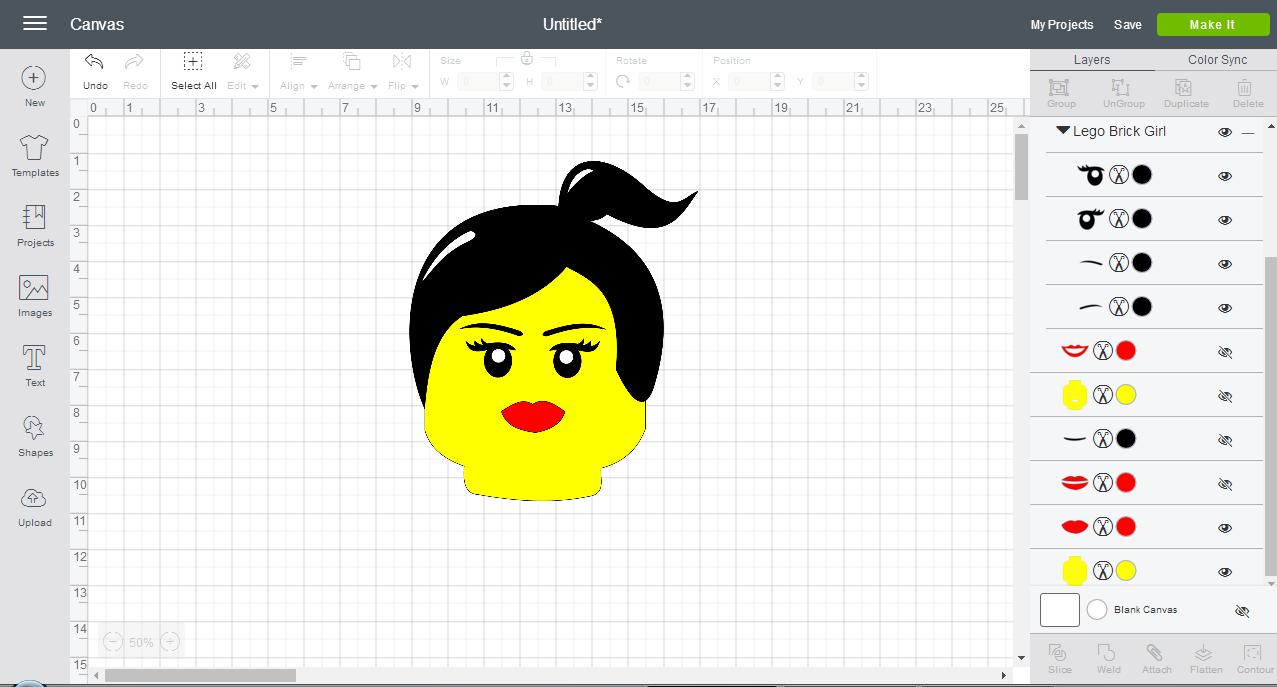
As discussed in prior sections of this commodity, there are two yellow head options in this file. The beneath image has a cutting-out for the mouth whereas the other simply has cut-outs for the eyes. The reason for this is to minimize the vinyl colors needed for the projection as well as to help with the alignment of other layers (ie: lips and eyes). Also, the caput keeps with the shape of the lego caput. If "hair" is used in the design, y'all would just oestrus press (iron) the "hair" over the yellow head layer.
Step 6: Cutting the Vinyl
When you accept picked your design, you lot are now set up to cut it onto heat transfer vinyl. To do then, on the top right of the screen, click the green Go far button. You volition exist brought to the mat view screens. This breaks down the layers by their color. It'southward important to note, that you tin substitute any color. For example, the red mouth layer tin can be cutting onto regal vinyl. The screen colors are just for reference. Regardless what color you cull, e'er exist certain that the layers are MIRRORED. You do this past selecting the MIRROR switch. When ironing on images, this must exist washed. Now, for the black and red images shown below, it is not overly critical as they are symmetrical. However, it is recommended to mirror every layer. This must exist washed before you keep to the final cut screen. And so click each layer and ensure that each section is mirrored before standing onto the last cutting.
Good luck and have fun!
| | |


Ofttimes Asked Questions
1.) What are my options if I don't want to use the hair highlight "cut-outs" ?
ans: The cutting-out segments mentioned are those in the pilus designs every bit well equally on i of the yellow heads (eyes and mouth). The reason for this is to minimize the number of vinyl colors that are used in the design. You can utilise the background (ie: white t-shirt) to represent the color. This may non be ideal for your particular design. And then hither are your options:
a.) Yous can create "filler" pieces to cut and transfer onto the prototype to supersede the cut-outs.
b.) You can fill up in the cutting-outs to make the layer one solid color.
Source: https://wannacraft.com/designspace/turning-layers-onoff-to-create-multiple-pictures
Belum ada Komentar untuk "How to Upload Layers in Cricut Designer"
Posting Komentar